Vuoi aggiungere la chatbox di WhatsApp e i pulsanti di condivisione in WordPress?
WhatsApp è una delle piattaforme di messaggistica più popolari e conta circa 2,2 miliardi di utenti in tutto il mondo. L’aggiunta di un pulsante di condivisione Whatsapp ti consentirà di connetterti con i clienti e aumentare il coinvolgimento degli utenti, mentre l’aggiunta di un pulsante di chat consentirà agli utenti di inviarti messaggi direttamente tramite il tuo sito web.
In questo articolo, ti mostreremo come aggiungere facilmente un pulsante di condivisione WhatsApp in WordPress.
Perché aggiungere un pulsante WhatsApp in WordPress?
WhatsApp è un’app di messaggistica istantanea che consente alle persone di tutto il mondo di contattarsi facilmente.
L’aggiunta di un pulsante di condivisione WhatsApp al tuo sito Web WordPress consentirà ai visitatori di condividere facilmente i tuoi contenuti con i loro contatti.
Inoltre, puoi anche aggiungere una chatbox WhatsApp che consente agli utenti di avere una conversazione diretta con te.
Ad esempio, se disponi di un negozio online , i clienti possono utilizzare un pulsante di chat di WhatsApp per effettuare domande sui prodotti senza dover compilare alcun modulo o rivolgersi all’assistenza clienti.
Ciò può comportare un maggiore coinvolgimento degli utenti e una riduzione dei tassi di abbandono del carrello .
Detto questo, vediamo come aggiungere facilmente un pulsante di condivisione WhatsApp in WordPress.
Metodo 1: aggiungi un pulsante Condividi WhatsApp in WordPress
Se desideri aggiungere un pulsante di condivisione WhatsApp al tuo sito web, questo metodo fa al caso tuo.
Innanzitutto, devi installare e attivare il plugin Sassy Social Share . Per ulteriori istruzioni, consulta la nostra guida per principianti su come installare un plug-in WordPress .
Dopo l’attivazione, devi visitare il menu Sassy Social Share dalla barra laterale di amministrazione.
Da qui, devi passare alla scheda “Interfaccia standard” in alto.
Quindi, devi scorrere verso il basso fino alla sezione “Seleziona servizi di condivisione” e selezionare semplicemente la casella accanto all’opzione WhatsApp.
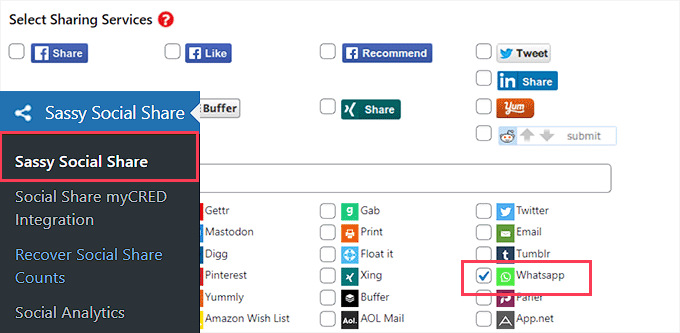
Puoi anche aggiungere il pulsante Condividi per altre piattaforme di social media tra cui Facebook, Instagram , Pinterest, Twitter e altro.
Una volta terminato, non dimenticare di fare clic sul pulsante “Salva modifiche” per memorizzare le impostazioni, quindi puoi andare alla scheda “Selezione tema”.
From here, you can customize the share buttons by changing their size, shape, logo or background color, and more. It’s a good idea to go with the WhatsApp brand colors for the share button so that users will recognize it more easily.
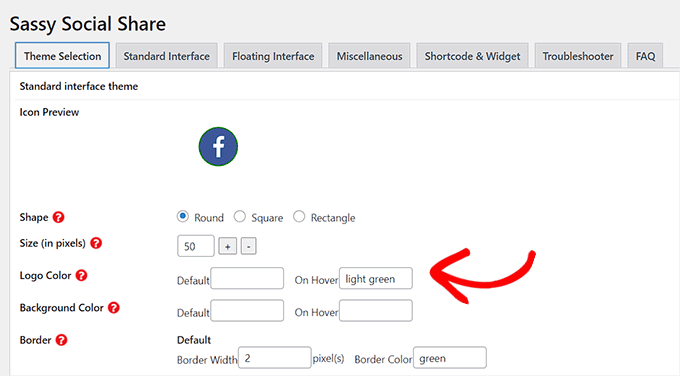
Once you are finished, don’t forget to click on the ‘Save Changes’ button to store your settings.
You can now visit your website to see your WhatsApp share button in action.
Here is how it looked on our demo website.
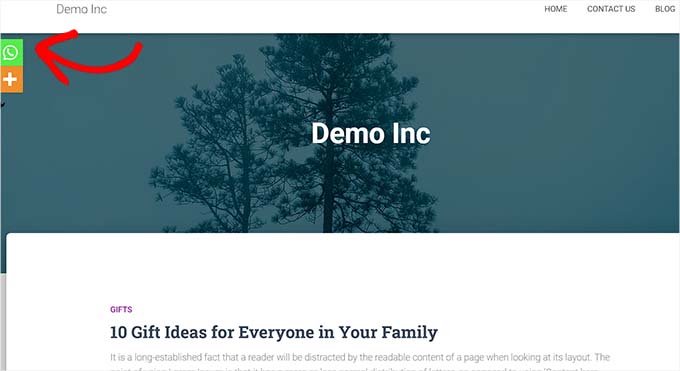
Don’t want to add WhatsApp button to every page? Don’t worry, the plugin also allows you to easily add it to single posts and pages as well.
Adding WhatsApp Share Button in Block Editor
If you only want to show the WhatsApp share button on specific posts and pages, then first you need to turn off the global display of sharing buttons.
To do that, simply go to the Sassy Social Share page in the WordPress admin sidebar and switch to the ‘Standard Interface’ tab.
Next, you need to uncheck the box for the ‘Enable Standard sharing interface’ option.
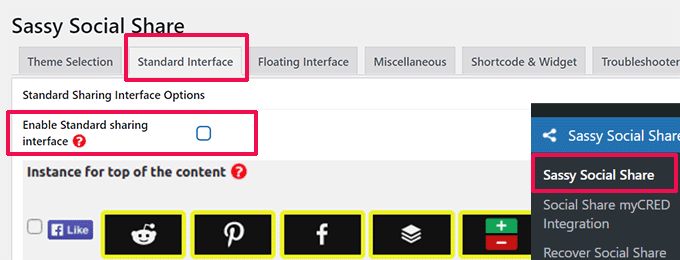
Next, switch to the ‘Floating Interface’ tab.
From here, uncheck the box next to the ‘Enable Floating sharing interface’ option.
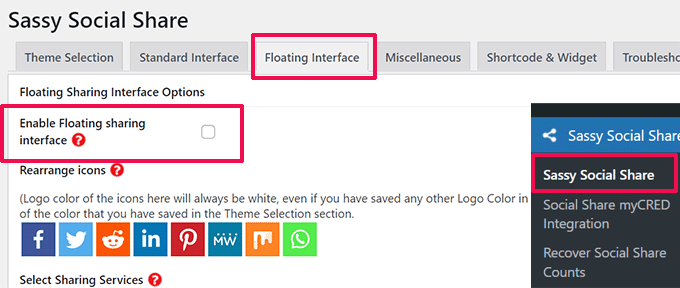
Now that you have disabled the standard and floating social sharing buttons, you go ahead and WhatsApp share button to any page or post on your website using a shortcode.
Simply open the post or page where you want to display the WhatsApp share button in the content editor, or you can just create a new one.
From here, simply click on the Add Block (+) button at the top left corner and search for the ‘Shortcode’ block. After that, simply add the block to the page.
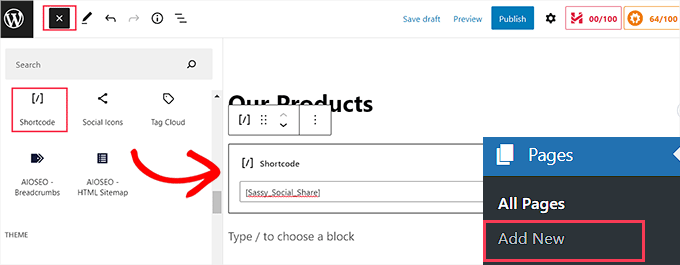
Next, you need to copy the following shortcode and paste it into the ‘Shortcode’ block.
Once you’re done, simply click on the ‘Publish’ or ‘Update’ button to store your changes. Your WhatsApp Share button will look like this.
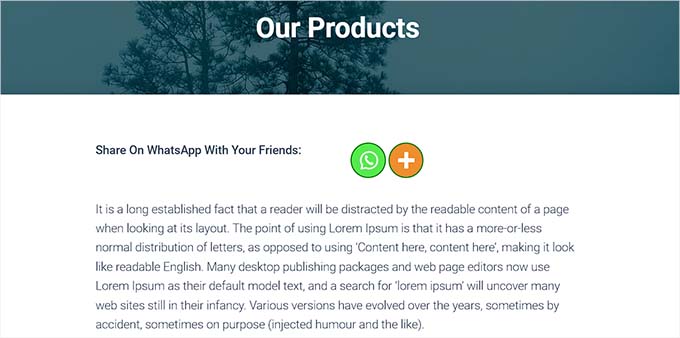
Adding WhatsApp Share Button as a Widget
To add the WhatsApp share button to the sidebar of your website, you need to visit the Appearance » Widgets page from the admin sidebar.
From here, simply click on the Add Block (+) button at the top left corner and locate the ‘Shortcode’ block.
Next, you need to add the ‘Shortcode’ block to the sidebar.
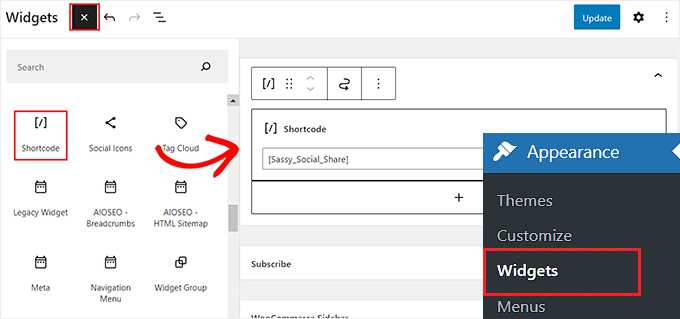
After that, simply copy and paste the following shortcode into the block.
Next, click on the ‘Update’ button to store your settings.
This is how your WhatsApp share button will look once it’s added to the website sidebar.

Adding the WhatsApp Share Button in the Full Site Editor
If you’re using a block theme, then you’ll be using the full site editor and won’t have access to the ‘Widgets’ page.
First, you need to visit the Appearance » Editor option from the admin sidebar to launch the full site editor.
Next, you need to click on the ‘Add Block’ (+) button at the top of the screen and add the ‘Shortcode’ block to any suitable place on your website.
After that, add the following shortcode to the block.
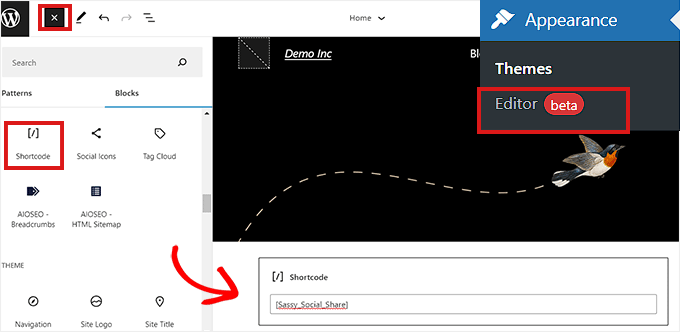
Once, you’re done, click on the ‘Save’ button at the top.
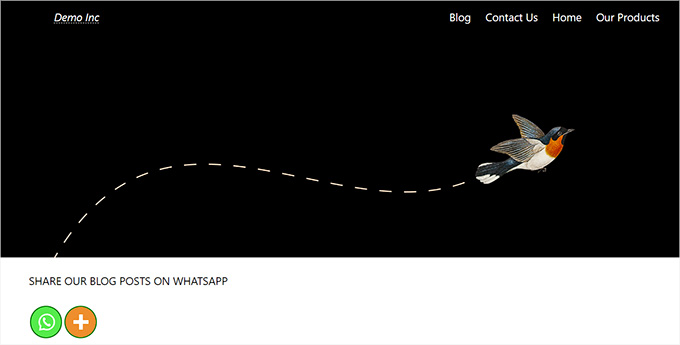
This is how the WhatsApp share button looked on our demo website.
Method 2: Add a WhatsApp Chatbox Button in WordPress
This method allows you to add a WhatsApp chatbox button in WordPress.
This means that when a user clicks on the WhatsApp chat button, they’ll be able to send you a direct message on your WhatsApp phone number.
Note: You won’t be getting any messages directly inside your WordPress dashboard, but you will be able to chat like normal in the WhatsApp mobile app, web interface, and desktop software.
First, you need to install and activate the Click to Chat plugin. For more instructions, see our step-by-step guide on how to install a WordPress plugin.
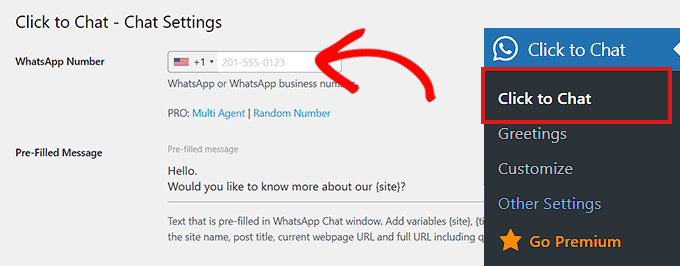
Upon activation, you need to head over to the Click to Chat menu item that has been added to your WordPress admin dashboard’s sidebar.
From here, you need to start by typing your business phone number in the ‘WhatsApp Number’ field.
This will be the phone number where you’ll receive messages from users.
After that, you need to type a simple message in the ‘Pre-Filled Message’ field. This will be the default message that will be displayed in your WhatsApp chat window.
Next, you need to scroll down to the ‘Style, Position’ section.
You can start by choosing a style for your WhatsApp chatbox from the dropdown menu. By default, this plugin offers about 8 different styles. Simply choose the one that you prefer.
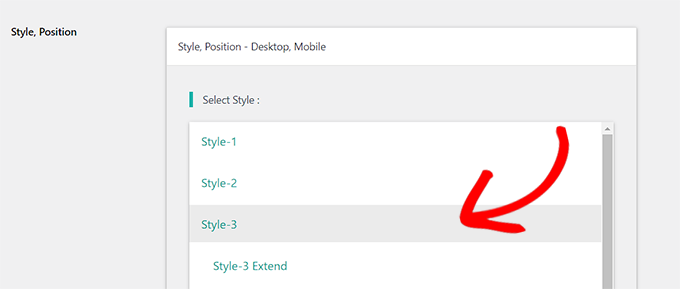
After that, you need to scroll down to the ‘Position to Place’ section.
From here, you can choose the position and size of your chatbox from the dropdown menus.
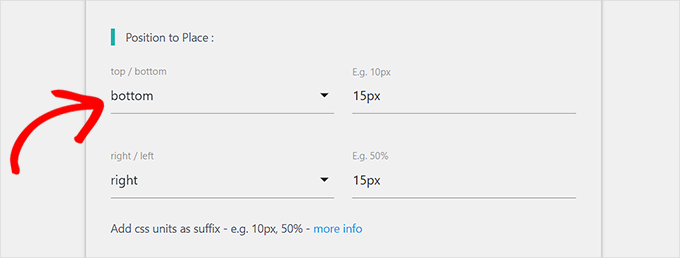
Next, you need to go to the ‘Display Settings’ section.
Here, you just need to check the ‘Global’ box next to the options where you want to display your WhatsApp chatbox.
For instance, if you want to display the chatbox on your posts, pages, and categories pages, you need to check the ‘Global’ option.
You can also choose the ‘Hide’ option if you don’t want to display the WhatsApp chatbox on a certain page.
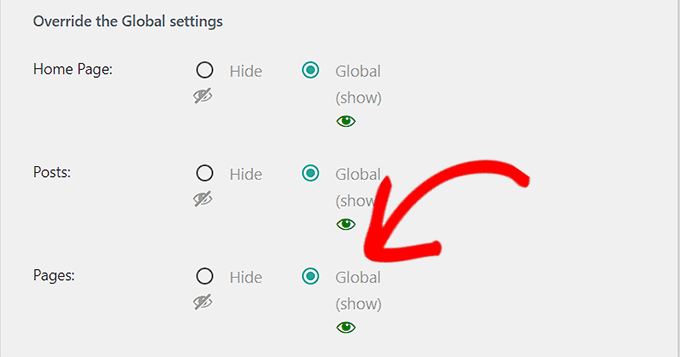
Finally, don’t forget to click the ‘Save Changes’ button to store your settings.
Now, you need to head over to the Click to Chat » Greetings page to select a Greeting dialog from a dropdown menu.
This greeting dialog will be shown along with the WhatsApp button on your page.
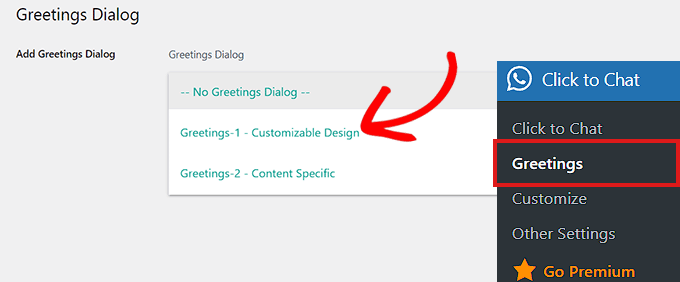
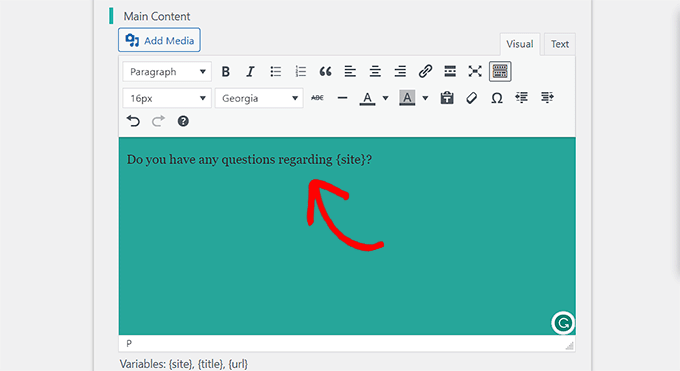
Once you’ve made your choice, you will need to type the content for the header, main content, and call to action of your greeting dialog.
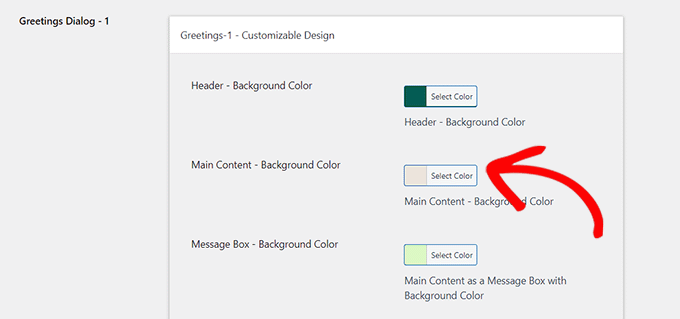
After that, scroll down to the ‘Customizable Design’ section.
Once here, you can choose the background colors of your main content, header, and message box.
After that, simply click the ‘Save Changes’ button to store your settings
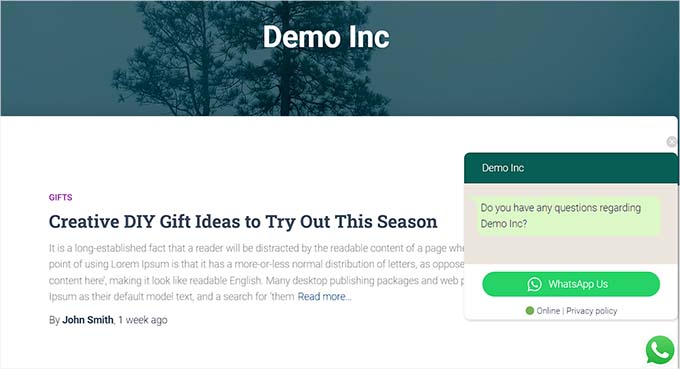
Next, you need to visit your website.
By default, this is how your WhatsApp chatbox will look like.
Now, we will show you how you can easily add the WhatsApp chat button in the block editor, as a widget, and in the full site editor.
Add the WhatsApp Chat Button in the Block Editor
You can easily add the WhatsApp button to a specific page or post on your WordPress website using the block editor.
For this tutorial, we will be adding the WhatsApp button to a page.
First, you need to go to the Pages » Add New page from the admin sidebar.
This will launch the block editor.
Now, you need to click the ‘Add Block’ (+) button at the top left corner of the screen and click on the ‘Shortcode’ block.
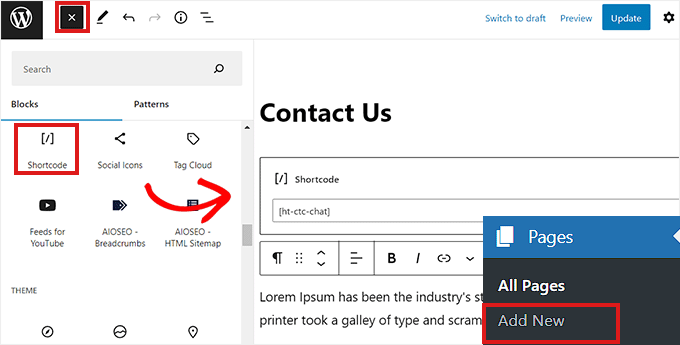
Once the ‘Shortcode’ block is added, you need to copy and paste the following shortcode into the block.
After that, simply click the ‘Publish’ button at the top.
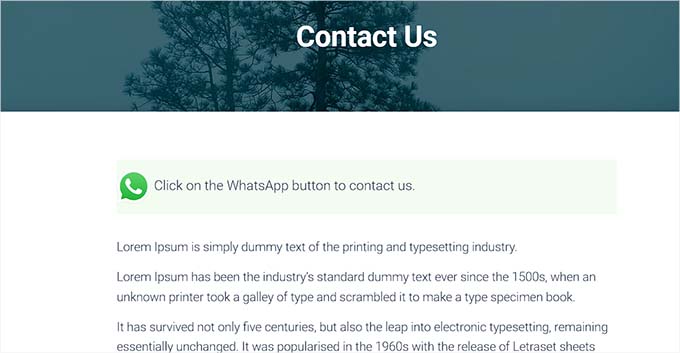
This is how the WhatsApp button looked on our demo website.
Adding the WhatsApp Chat Button as a Widget
In this method, we will show you how to easily add the WhatsApp button as a widget in the sidebar of your website.
First, you need to head over to the Appearance » Widgets page from the WordPress sidebar.
Once there, simply click on the ‘Sidebar’ tab to expand it and then click the ‘Add Block’ (+) button at the top.
Next, simply locate and add the ‘Shortcode’ block to the sidebar.
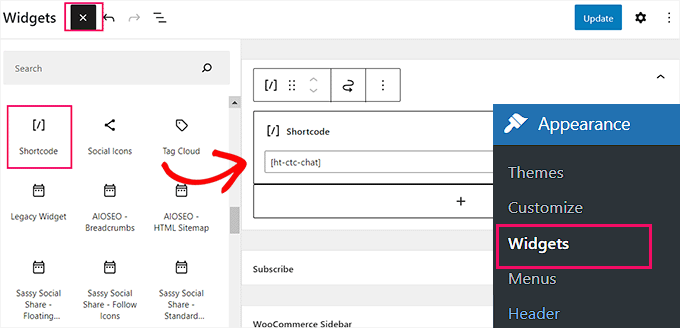
Now, simply copy and paste the following shortcode into the block.
Finally, don’t forget to click the ‘Update’ button to store your settings.
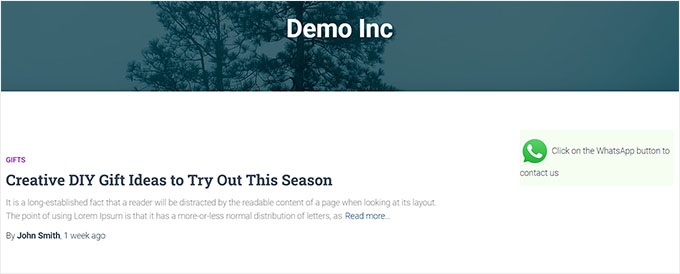
This is how the WhatsApp button looked after being added to the sidebar on our demo website.
Adding the WhatsApp Chat Button in Full Site Editor
If you’re using a block-based theme with a full site editor, then this method is for you.
First, head over to the Appearance » Editor page to launch the full site editor.
Once there, simply click the ‘Add Block’ (+) button at the top left corner of the screen.
Now, simply locate and add the ‘Shortcode’ block to your preferred place on the site.
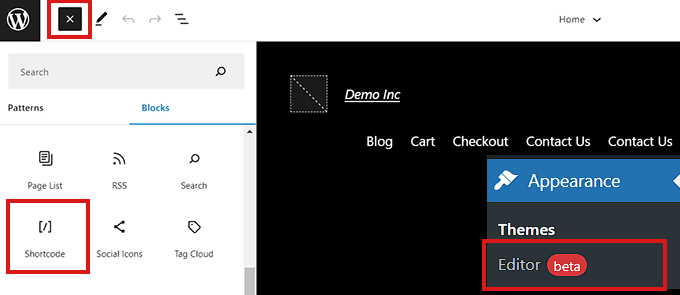
Once the block is added, simply copy and paste the following shortcode into the block.
In the end, don’t forget to click the ‘Update’ button at the top to save your changes.
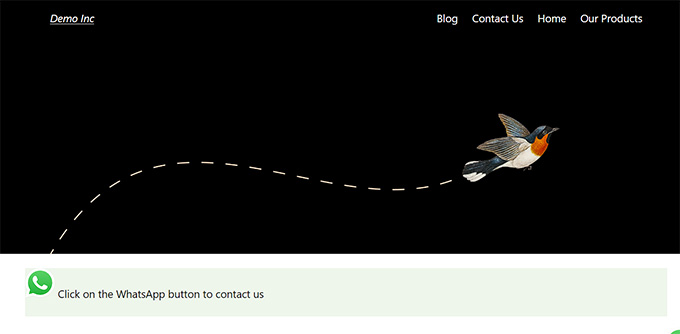
This is how the WhatsApp button looked on our site.
We hope this article helped you learn how to add a WhatsApp share button in WordPress. You may also want to see our top picks of the best social media monitoring tools for WordPress users, and our beginner’s guide on how to build an email list.
If you liked this article, then please subscribe to our YouTube Channel for WordPress video tutorials. You can also find us on Twitter and Facebook.
